If you are hosting a WordPress site on Light Speed Server , the biggest advantage is that you can use the Light Speed Cache plugin, the ...
If you are hosting a WordPress site on Light Speed Server, the biggest advantage is that you can use the Light Speed Cache plugin, the official caching technology of Light Speed Server, for free. Light Speed Cache is a very powerful plugin if you can configure it properly. You will not find so many features in many paid WordPress cache plugins that a single light speed cache plugin has.
You can get all the benefits of the Light Speed Cache WordPress plugin on your WordPress site only when you use Light Speed Web Server. And let me tell you, all ExcelNode hosting plans have light speed web server support. So as an ExcelNode customer, you can easily turn your WordPress site into a rocket by using Light Speed Cache.
So today's topic is, how to set the best configuration of the Light Speed Cash plugin as a beginner? Cash configure but on the go is no work, you install and leave! You have to understand what you are really doing, only then you can achieve rocket level speed. So let's get started.
Best settings for Light Speed Cache plugin
So you hosted your WordPress site on a Light Speed Web server, and installed the Light Speed Cache plugin, what do you do now? Many leave it in the Just Basic settings, where many people explore all the tabs to get an idea of what they are doing and create the best configuration.
So if you're on the second team, yes, you've come to the right place. Today we will discuss the best configurations of Light Speed Cash, along with trying to explain the processes in simple language, so that as a beginner you can understand everything.
The Light Speed Cache plugin has two main functions, first, it caches the pages of your dynamic WordPress site, so that the page can be rendered to the visitor quickly by reducing the load on the server. Second, it helps to optimize your site. So if you just use the LSCache plugin to use the caching function, then just activate the plugin and enable LiteSpeed Cache> Settings> General to Enable LiteSpeed Cache. Nothing more to do. If you leave this as the default settings it will work comfortably on most WordPress sites.
Are you still in this article? Well, that means you definitely need more than just caching! Below we will discuss each tab in detail so that you can really understand which function is reserved for exactly which task.
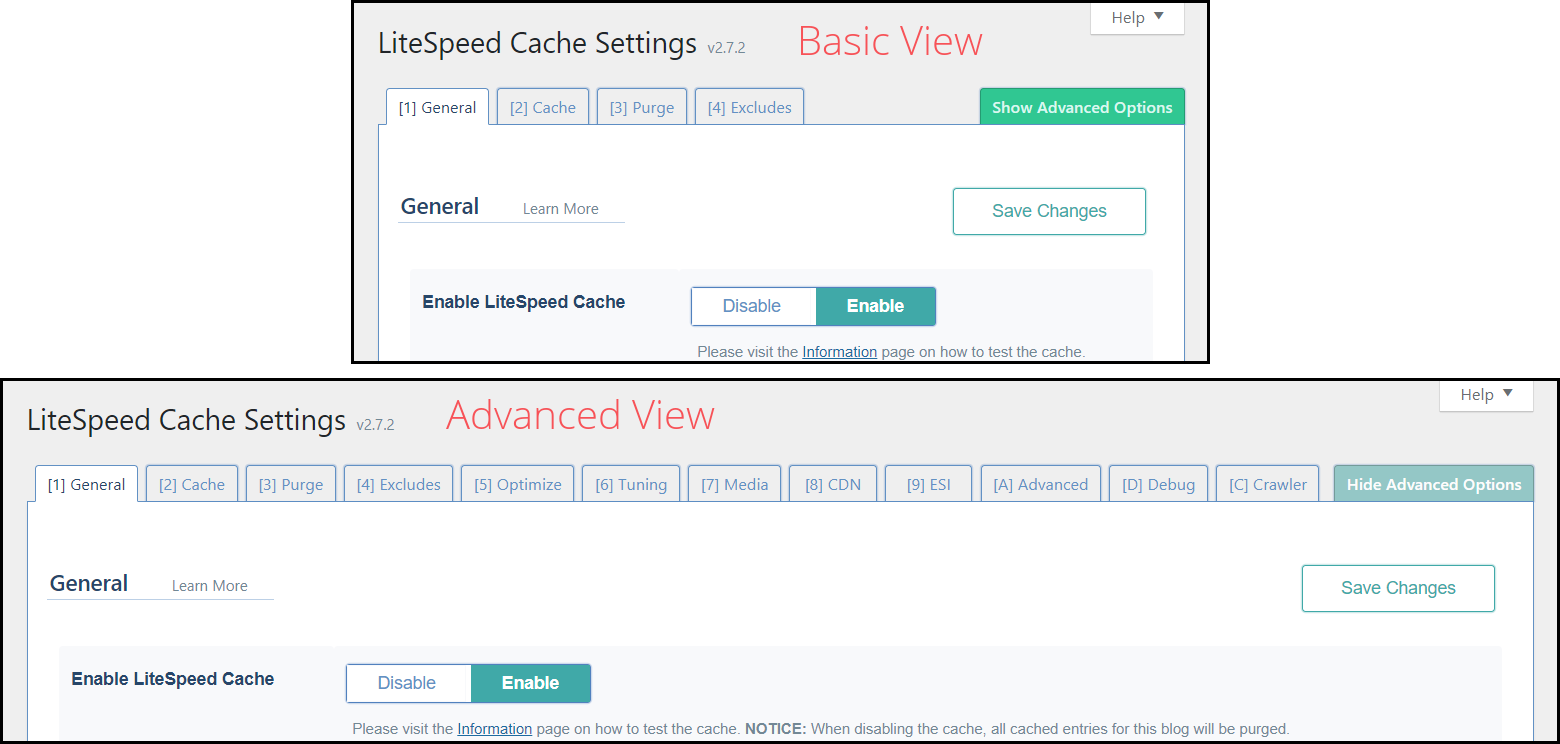
First let's get an idea about the settings of this plugin, here are three types of settings. This plugin is in basic mode when used for the first time. Then only 4 tabs can be seen which can enable the cache-related function of the site. If you click on the Show Advanced Options button, 8 new tabs will open. Any tab group for any task can be clear from the screenshot below.
General
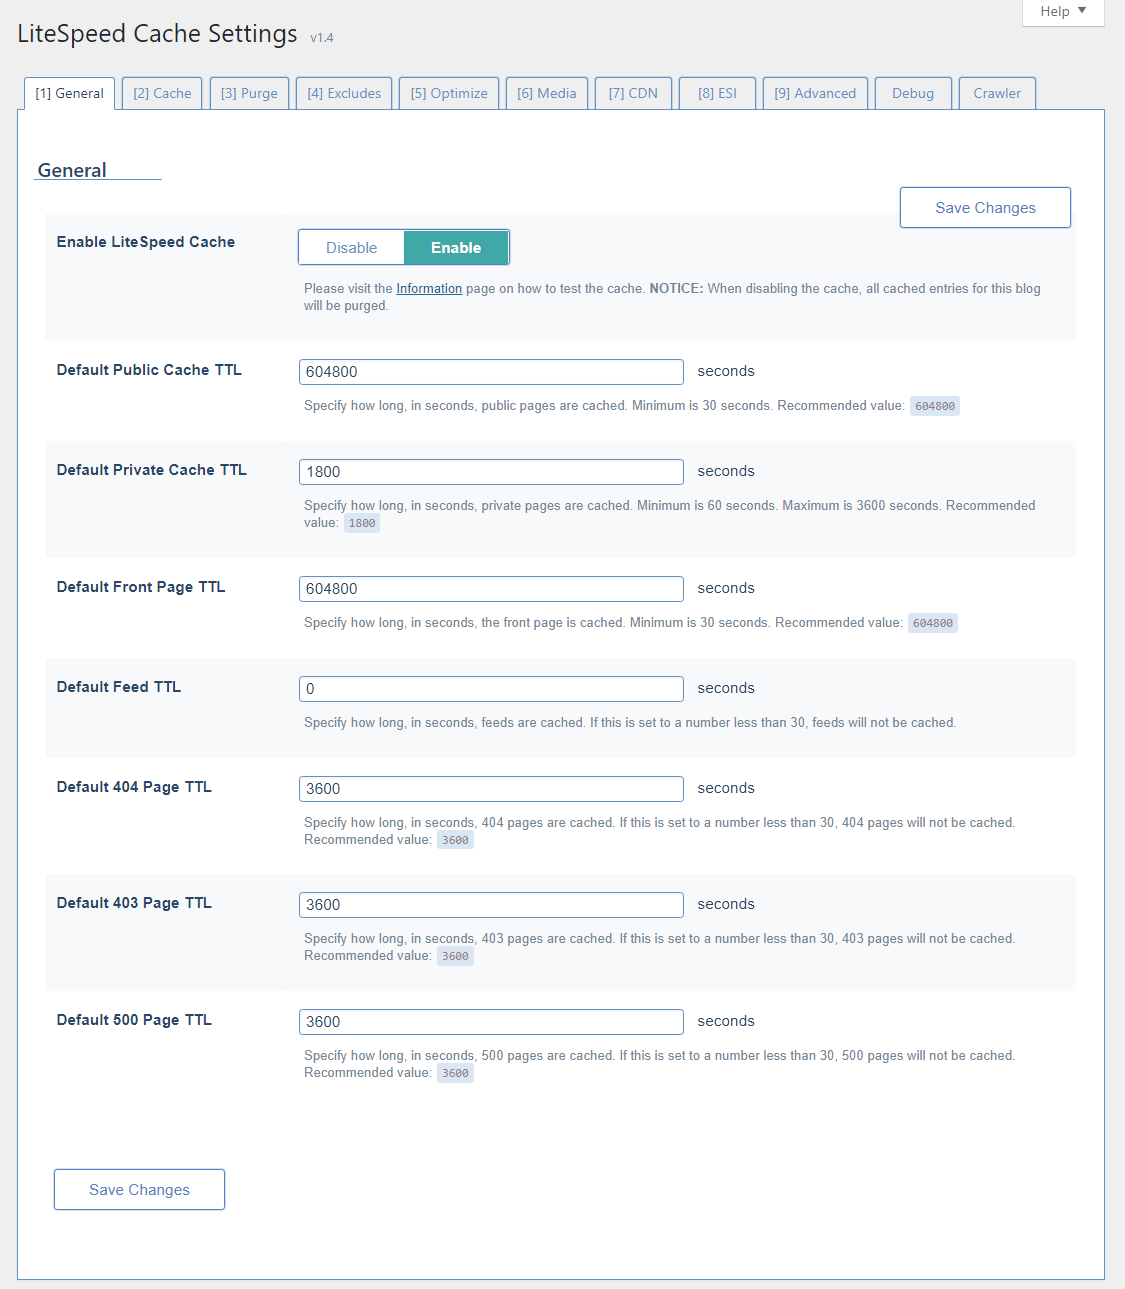
Let's start with the General tab, the Basics tab, where you can turn the caching function on or off with a single click. Enable LiteSpeed Cache There is no need to explain again what will happen if you enable or disable it. You will then see many functions called TTL on this page; For example- Default Public Cache TTL, Default Frontpage TTL - etc. Here TTL means “Time to Live”.
You will see that the value is set here as a second. This means that if this set time is exceeded, the Light Speed Cache plugin will automatically delete the caches created for that part and create new caches. Most of the time I will ask you to keep these settings by default, it will work perfectly with any site. However, you can increase or decrease these times according to your needs.
Suppose your homepage is updated a lot every day. In that case, you can reduce the time of Default Frontpage TTL. Again, static pages, which are updated too late, can increase the time. But best to leave by default.
Cache
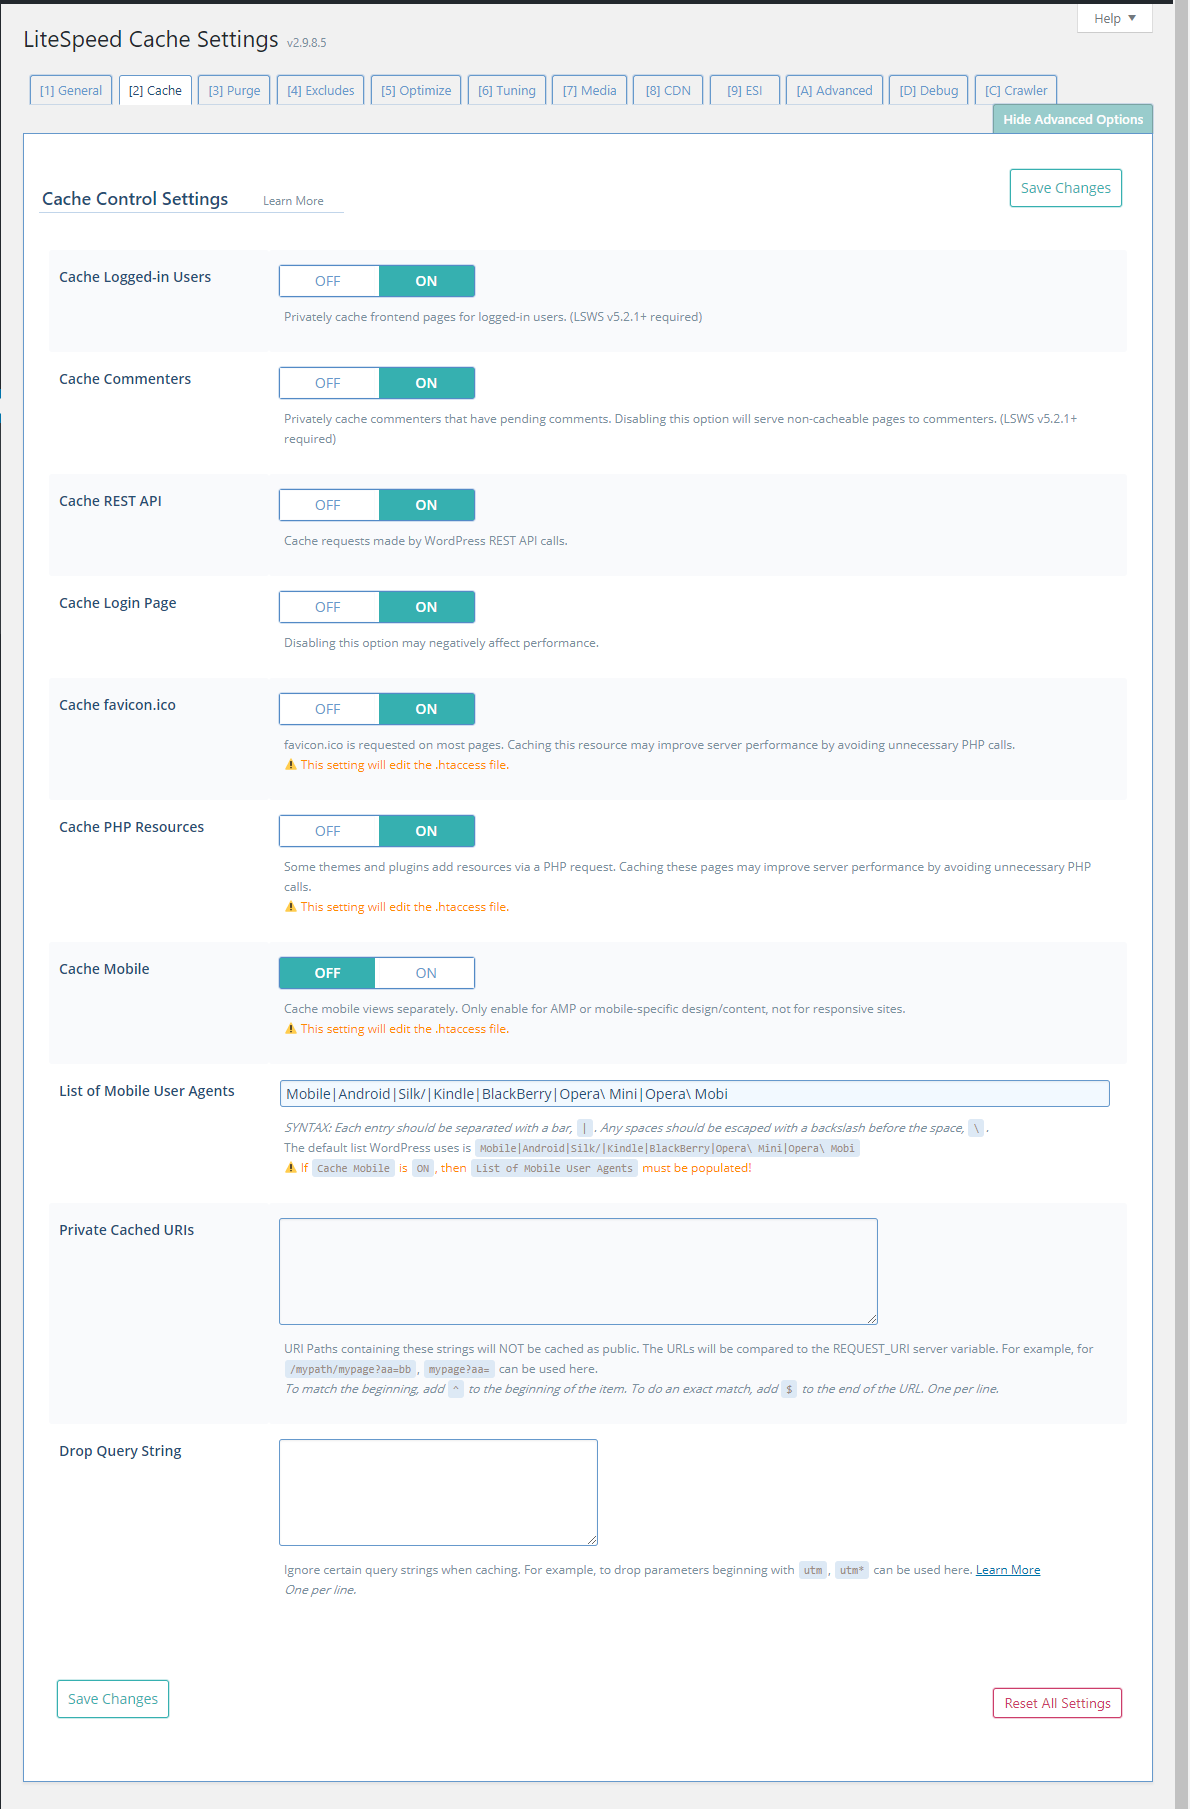
In the Cache tab, you can specify which type of content you want to cache and which type of content you do not want to cache. Cache Logged-in Users, Cache Commenters, Cache Login Page - etc. From these terms, it is easy to understand what is being cached here. Everything is enabled in this tab by default, for the best-caching experience I will ask you to keep the default setting here. Then you can adjust as you wish at any time.
And yes, if your site has AMP-enabled or has a different design for mobile, you need to enable the Cache Mobile option, or leave it off!
Purge
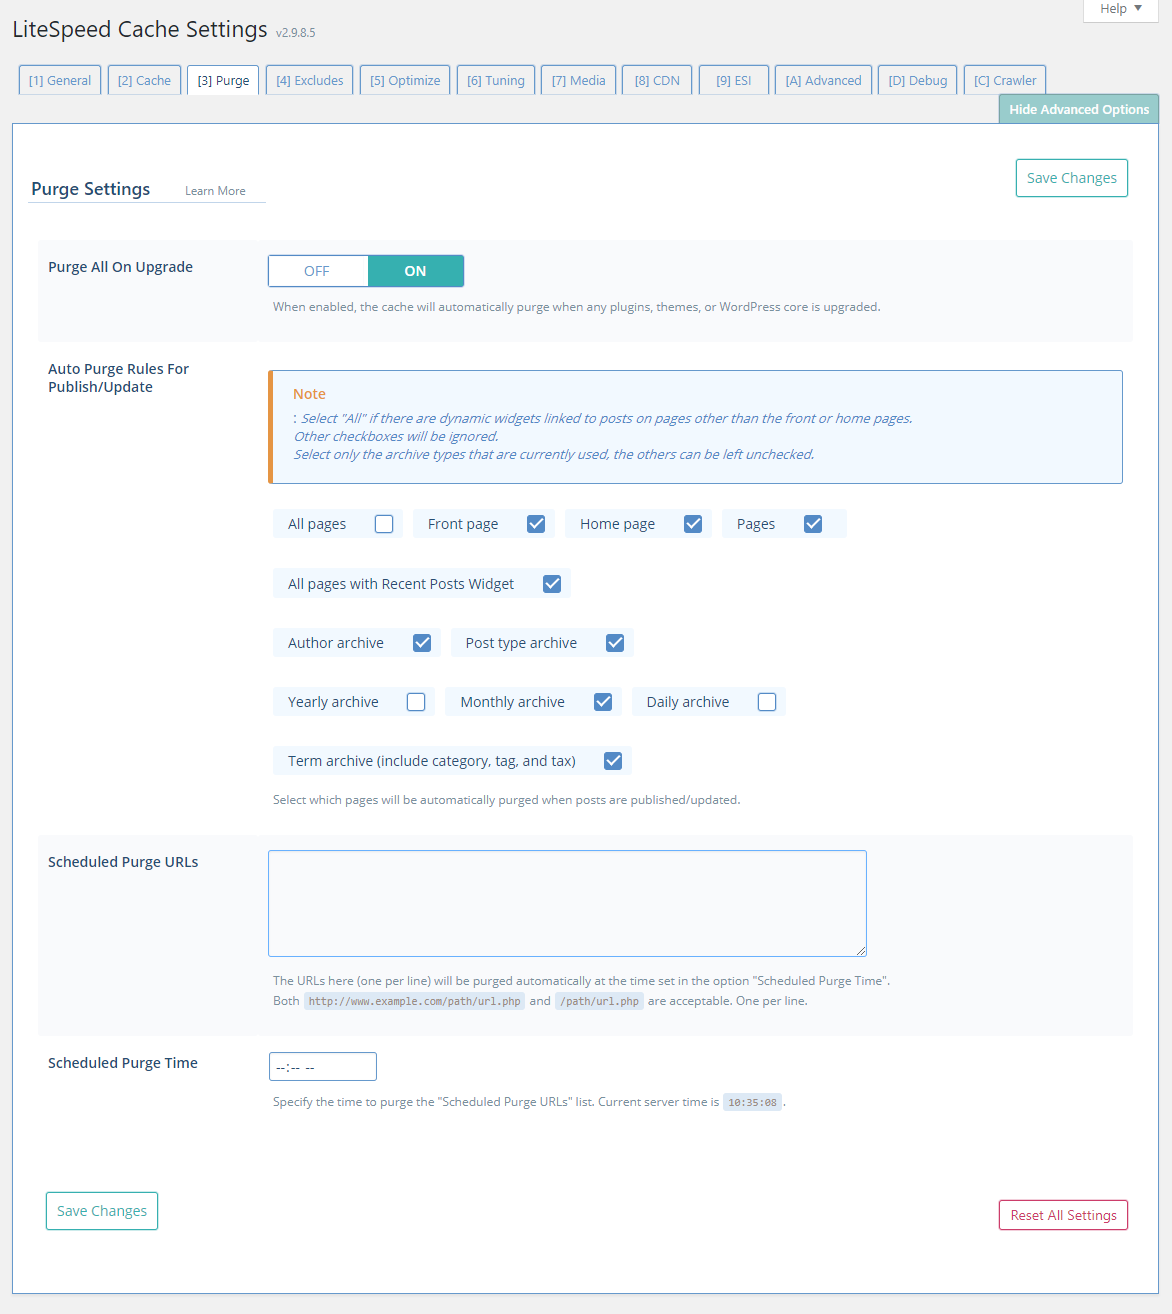
This tab is mainly used to remove cached pages. Suppose you have updated the site, then surely you do not want to show the old cached version? The new version will only be shown when the old cache is cleared and a new cache is created. Not only that, after enabling/disabling, installing/uninstalling any new plugin on your site, you need to clear the cache later. Now, this tab is for configuring when and how these purges can be done automatically!
Purge All on Upgrade - This function is enabled by default, all caches will be automatically purged if any theme, plugin, or WordPress core is upgraded on your site. If you disable this option, you will have to handle it manually each time.
After that, Auto Purge Rules For Publish / Update - Here you can see which pages will be automatically purged after updating or publishing which can be set. You can leave the diameter by default, or set it as you wish.
Scheduled Purge URLs - This option allows you to add custom URLs as desired. You can add a different URL to each line. And you can set the scheduled time from the Scheduled Purge Time option. Now let me say, there is no need for this function in general, Light Speed Cache handles most of the purge by itself. However, if for some reason you need this setting later, you can enable it!
Excludes
This part of the caching is the Light Speed Cache plugin is a command of which parts of the site will not be included in the cache. Again, there is no need to change most of the settings. However, you can change these settings for any special needs.
There is no need to give any of the above settings here, but one option that may come in handy is Do Not Cache Roles - here you can control which type of users will be served the cached version or not.
Now the rest of the tabs are for advanced users, especially if you want to optimize the site using the Light Speed Cache plugin, you need to configure the settings of these tabs. In this article, I will not show advanced settings. Since this is an article specifically targeted at beginners. However, in another article, I will discuss these advanced settings step by step.
Advanced Settings also has some cache settings, which can be called advanced cache settings. The next article on-site optimization is coming up, there will be detailed optimization settings, and here is at least an overview of advanced-cache.
ESI
The full form of ESI is "Edge Side Includes" - here you can create punch holes in public content and fill that hole with private content (uncashed). This function can be used especially for e-commerce sites, shopping carts, personalized gridings. This setting is disabled by default.
Advanced
As soon as you hear the name of this tab, you will understand that it is for advanced users. I will discuss the settings of this tab in the next article. If you don't have a good idea, it is better to stay away from this tab. If you use more than one cache plugin on the site, then if you are proud of this advanced tab, the settings may conflict with different plugins.
Debug
There is nothing to test in this tab, only this tab will work if you have any problem and you want to check any log. As long as there is no problem, there is no need to go around this tab. And yes, there will be details in the next tutorial with this tab!
Crawler
This setting is also disabled by default. If this is enabled, the Light Speed Cache crawler will visit every page of your site and will refresh the pages that have expired cache, purge the old cache and build a new cache. The crawler feature, however, will use a lot of resources from the server, so many hosting companies may not allow it. However, if you use a VPS server or a dedicated server, there is no problem, you do not need permission from the hosting. By enabling it, your cash will always be fresh!
Last word
You can speed up your WordPress site by simply enabling the cache section from the Light Speed Cache plugin. And yes, you can improve the page speed ranking factor by using optimization techniques and configuring the correct settings. This will be discussed in-depth in the next tutorial!




No comments